Are you having trouble taking good pictures of your pet? I am here to help you by giving you tricks to take the best pictures of your animal companions!
The photo essay of this blog post features my niece, Jackie! She is a yellow lab who lives in Virginia with my older sister, Emily! Emily took photography classes in high school and fell in love with the art format. She has always had an eye for capturing moments and colors in a picture, and now she has the perfect tools to succeed in this feat! She takes a wide range of pictures, from landscapes, to still life, to portraits with Jackie the lab as her trusty model.
I hung out with them to help you, the reader, find out how to get the best picture for your animal companions! I also watched “Animal Photography,” on Kanopy, where National Geographic photographer, Joel Sartore and his “super doodle”, Muldoon, give some insight to pet photography as well.
The first step, get your camera. Joel Sartore says, “I just have a camera ready to go, and ready to take pictures wherever he is.”
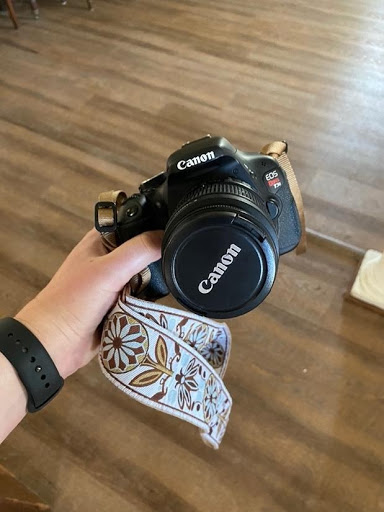
As long as you have a camera, either a Canon, Nikon, or a camera on your smartphone, you have the capability of taking a good picture of your pet. In this article, Em is using her Canon Rebel, which is pictured below and Joel uses a different professional camera in his video.
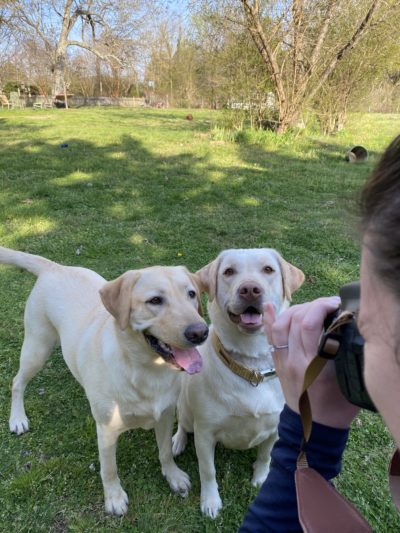
Now, we have our device to shoot, we need our models, Jackie and Millie. They are yellow labradors, and fun fact, they are sisters! Millie, the broader lab, is the older sister and Jackie, the skinnier pup, is the youngest. They do everything together. They sleep, eat, hold sticks, and play together. They also love to pose together. Here they are below!
In the Kanopy video with Joel, he also has a dog as his model, Muldoon, which he calls “a living prop.” Since both examples feature dogs, and dogs are always ready to spring to action at the slightest noise, how can we have incentive to keep our models in place?
Treats.
Use whatever treat your pet loves. In our case, it’s Milkbones, which is Jackie and Millie’s favorite treat by far. It is Muldoon’s favorite, too! Use your pets’ favorite snack, and you will have the most well-behaved models!
Okay, now that we have our camera, our models, treats… Now I think we are finally ready to take some pictures!
While taking pictures, one thing that Em wants photographers to keep in mind is lighting.
“I follow the light to get a good picture. Make sure it isn’t too bright or dark and adjust the ISO (measurement of the camera’s ability to capture light),” she says. Exposure is an important element to think about when working on the lighting of the picture. Exposure is used to depict how light or dark an image is. This can be fixed while editing images in an app or as mentioned before, playing around with the ISO as well. In his video, Joel shows the pictures he has taken of Muldoon from inside his house. To accomplish taking indoor pictures with less lighting, Joel says, “It’s on aperture priority, and it is on a high enough ISO that I can get him indoors no matter what the light, as long as there is a little bit of daylight.” This is a good point to think about when planning to take pictures of a person or an animal, the ability to take pictures inside if the weather doesn’t agree with your plans. Huh? What is aperture priority? Good question! Aperture Priority is a camera mode in which you manually set your aperture while the camera picks the shutter speed. This can help make sure you get the perfect shot when taking pictures of your pet! Joel also believes in getting level with your model (also known as, your pet).
“No matter what your pet, I don’t care if it is a goldfish, get eye-level with your animal…so many of us don’t think to do anything but stand at our height (about 5 feet) and shoot down. It does your pet a disservice. I always get eye level and it really is a beautiful thing,” he says.
Let’s take what we have learned into consideration. Make sure you have good lighting, play around with your camera’s instruments (ISO, Exposure, and Aperture Priority) when needed, keep treats on hand, and get eye level with your pet! Emily and I used the advice given and here is our end result!
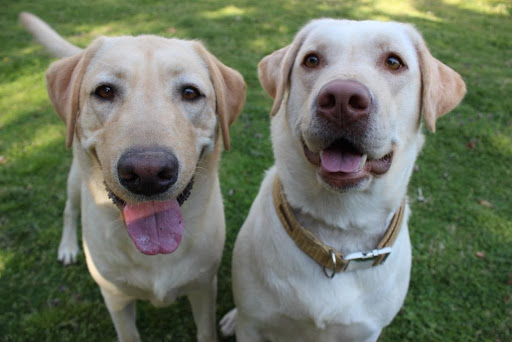
Aren’t they just ravishing in this picture? In conclusion, take your time with photography, especially when messing with the features and editing. I hope this blog post has helped answer questions you may have had regarding taking pictures of yourself or your pets. To watch more of Joel’s video regarding how to take the best pictures of your pet, here is the link.
Joel’s video is Episode Ten of National Geographic’s “The Fundamentals of Photography II.” The rest of the episode shows Joel taking pictures of different animals in different settings and it is really cool to watch. Other episodes of the series are listed below the video I referenced, each one goes into different aspects of photography and are about thirty minutes in length.
Need a little more help with your photography? Check out our Digital Photography Club! They meet on the last Thursday of each month, where you can learn the basics of digital photography! Bring your own camera, smartphone, or tablet, and each month we will practice a new skill. Next meeting is Thursday, August 24th at 6pm!


