
Looking for a fun, DIY project to brighten up your room or give as a unique gift? How about making your very own snowglobe, complete with custom polymer clay figures? It’s easier than you think, and the possibilities are endless!
Supplies You’ll Need:
Let’s Get Started!
1.) Sculpt Your Scene
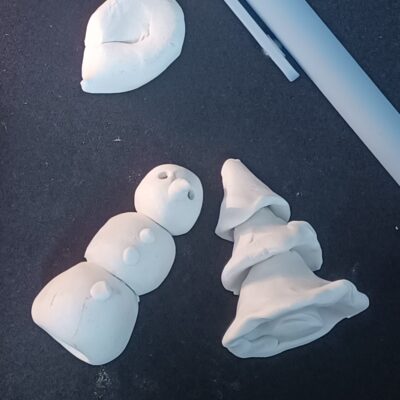
This is where your imagination truly shines! Think about what you want inside your snowglobe. Will it be a tiny animal, a miniature landscape, a cute character, or something completely abstract? Use your polymer clay to sculpt your figures. Remember, they need to be small enough to fit comfortably inside your jar.
2.) Bake Your Creations

Once you’re happy with your sculptures, it’s time to make them permanent! This involves baking them in an oven or toaster oven at a specific temperature for a certain amount of time, depending on how large or thick each piece is. Follow the baking instructions on your polymer clay packaging carefully. Typically, polymer clay is baked at around 250° F for 15 minutes, but every clay is different. Polymer clay can also be baked multiple times, so if you’re worried about it coming out “undercooked,” you can always put it back in the oven for longer! Once you’re happy with your pieces, allow them to cool completely after baking.
3.) Decorate and Design
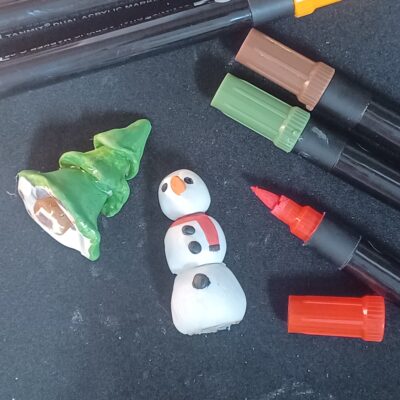
If you want to further customize your figures, or only have white clay, you can optionally paint your figures with acrylic paint to add to their designs! Just make sure they are completely dry before adding them to your jar, and it’s recommended to use a waterproof sealant spray to make sure they won’t flake or peel when exposed to the water in your snowglobe. Or, you can leave your pieces all white for a full “blizzard” effect!
*Not in the mood or don’t have the materials to sculpt? You can also make snow globes with old plastic toys! Swap out your clay figures for plastic dinosaurs, rubber duckies, ponies, or anything that is hard plastic or rubber (just make sure they don’t have any components that can’t sit for long periods submerged in water, like doll hair or metal wires or joints) to create a unique, upcycled piece to display!
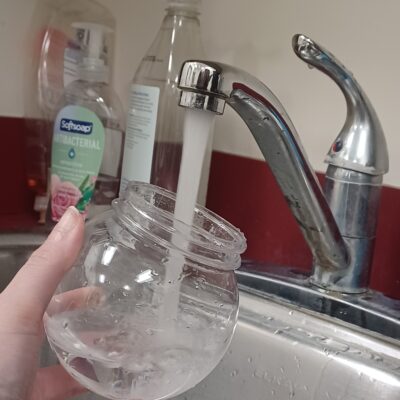
4.) Prepare Your Jar
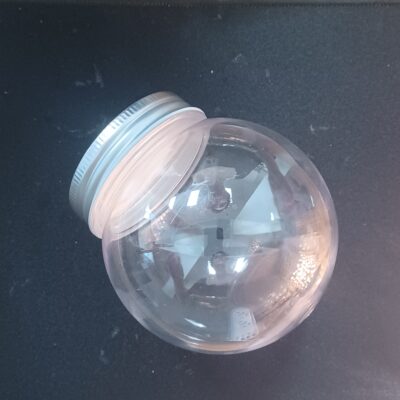
Make sure your jar is sparkling clean and dry. This will ensure your snowglobe is crystal clear!
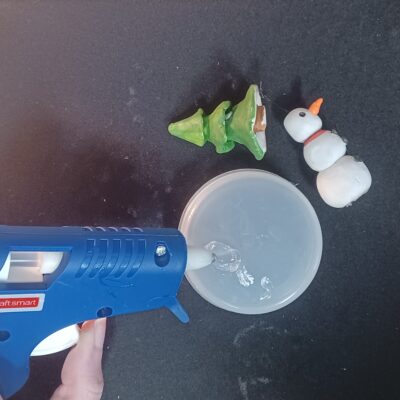
5.) Glue Your Figures
Using your hot glue gun, carefully attach your baked polymer clay figures to the INSIDE of your jar’s lid. Make sure they are secure and positioned exactly how you want them to appear in your snowglobe. Let the glue dry completely.

6.) Mix the Magic
Fill your jar almost to the top with water. Now, for the secret ingredient: vegetable glycerine! Add a few teaspoons of vegetable glycerine to the water. This is what makes your glitter fall slowly, creating that beautiful “snow” effect. You can experiment with the amount – more glycerine means slower falling glitter.
7.) Add the Snow

Sprinkle in silver or white glitter. You can also add other tiny sparkly bits if you like! If you’re not sure how it will look, test it out in a small container first by adding water and glycerine and stirring the contents to watch how it settles. Not all glitter is made equally, so not all will react the same way. Don’t go overboard; a little goes a long way to create a gentle snowfall.
8.) Seal It Up
Carefully turn the lid upside down and screw the lid (with your glued-on figures) onto the jar, making sure it’s TIGHTLY sealed. You don’t want any leaks! If you’re worried about leaks, you can run a thin bead of hot glue around the rim of the lid for extra security.
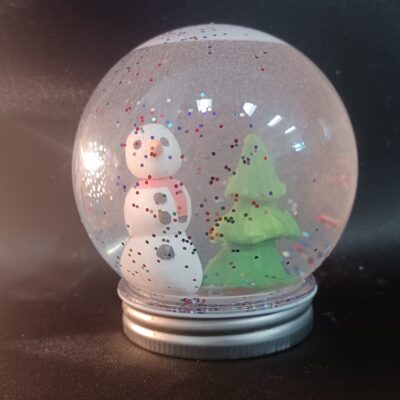
9.) Shake and Enjoy!
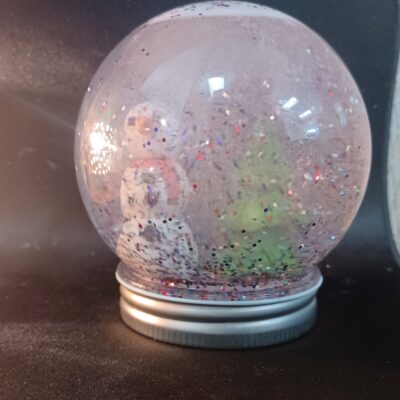
Give your snowglobe a gentle shake and watch your custom winter wonderland come to life! Place it on your desk, shelf, or give it to a friend.
❄️ Whether it’s a whimsical gift or a charming addition to your own space, a handmade snowglobe is a delightful way to capture a little bit of magic. So gather your supplies, let your imagination run wild, and enjoy the process of bringing your miniature world to life! ❄️


